
Live Bitcoin Price Tracker in SwiftUI
To celebrate Bitcoin’s milestone in breaking $70,000 and reaching a new all-time high, let’s build a live Bitcoin price tracker in SwiftUI using a WebSocket connection. This tutorial will guide you through the process step-by-step, explaining each component along the way.
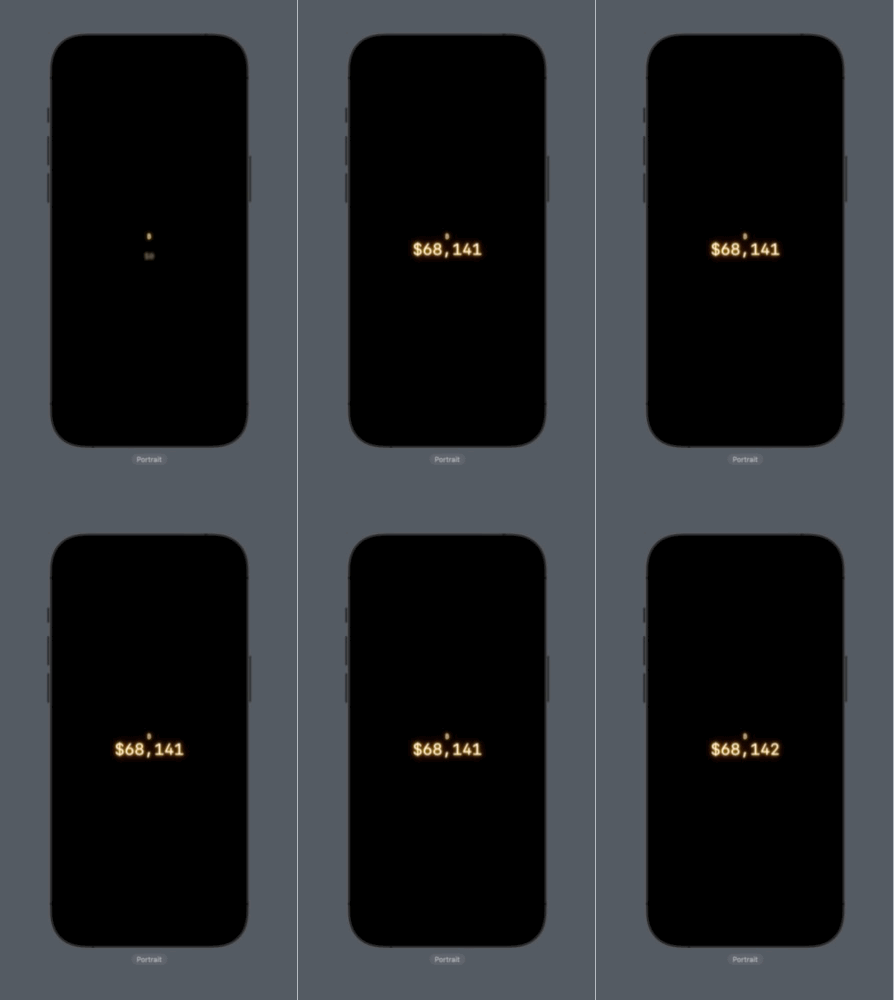
Step 1: Define the Data Model
First, we’ll create a simple data model to map the JSON we’ll receive from the API:
struct BitcoinPriceResponse: Codable {
    var bitcoin: String?
}
This structure conforms to the Codable protocol, allowing easy decoding of the JSON response.
Step 2: Create the ViewModel
Next, we’ll create a ViewModel to handle the logic and connection to the WebSocket API. We’ll use the new @Observable macro to simplify observing data changes in our view:
@Observable
class WebSocketViewModel {
    var bitcoinPrice: String = "Loading..."
    var btcDouble: Double = 0.0

    private var webSocketTask: URLSessionWebSocketTask?
    private let urlSession = URLSession(configuration: .default)

    // ... (connect, disconnect, receiveMessage, and decodeMessage functions will be added here)
}
Let’s break down the key functions in our ViewModel:
Connect Function
func connect() {
    guard let url = URL(string: "wss://ws.coincap.io/prices?assets=bitcoin") else {
        print("Invalid URL")
        return
    }
    webSocketTask = urlSession.webSocketTask(with: url)
    webSocketTask?.resume()

    receiveMessage()
}
This function establishes the WebSocket connection and starts receiving messages.
Disconnect Function
func disconnect() {
    webSocketTask?.cancel(with: .goingAway, reason: nil)
}
This function cleanly disconnects the WebSocket when needed.
Receive Message Function
private func receiveMessage() {
    webSocketTask?.receive { [weak self] result in
        switch result {
            case .failure(let error):
                print("WebSocket receive error: \(error)")
            case .success(.string(let str)):
                self?.decodeMessage(jsonString: str)
                self?.receiveMessage() // Continue listening
            default:
                break
        }
    }
}
This function handles incoming messages from the WebSocket and continues listening for new messages.
Decode Message Function
private func decodeMessage(jsonString: String) {
    guard let data = jsonString.data(using: .utf8) else { return }
    do {
        let response = try JSONDecoder().decode(BitcoinPriceResponse.self, from: data)
        if let bitcoinPrice = response.bitcoin {
            DispatchQueue.main.async {
                self.bitcoinPrice = "\(bitcoinPrice)"
                self.btcDouble = bitcoinPrice.toDouble() ?? 0.0
            }
        }
    } catch {
        print("JSON Decoding error: \(error)")
    }
}
This function decodes the JSON response and updates the ViewModel’s properties with the new Bitcoin price.
Step 3: Create the SwiftUI View
Now, let’s create a SwiftUI view to display the Bitcoin price:
struct BitcoinPriceView: View {
    var viewModel = WebSocketViewModel()

    var currencyFormatter: NumberFormatter = {
        var formatter = NumberFormatter()
        formatter.maximumFractionDigits = .zero
        formatter.numberStyle = .currency
        formatter.currencySymbol = "$"
        return formatter
    }()

    var body: some View {
        VStack {
            Image(systemName: "bitcoinsign")
                .font(.caption2)
                .glow()
            Text("\(currencyFormatter.string(from: viewModel.btcDouble as NSNumber)!)")
                .font(.largeTitle)
                .monospacedDigit()
                .transaction { transaction in
                    transaction.animation = .default
                }
                .contentTransition(.numericText(value: viewModel.btcDouble))
                .glow()
        }
        .fontDesign(.monospaced)
        .onAppear {
            viewModel.connect()
        }
        .onDisappear {
            viewModel.disconnect()
        }
    }
}
This view uses the ViewModel to display the current Bitcoin price. It also applies some styling and animations to make the display more engaging.
Step 4: Add Helper Extensions
To enhance our view, we’ll add two helper extensions:
String Extension
extension String {
    func toDouble() -> Double? {
        return NumberFormatter().number(from: self)?.doubleValue
    }
}
This extension helps convert String values to Double.
View Extension
extension View {
    func glow() -> some View {
        self
            .foregroundColor(.white)
            .background {
                self
                    .shadow(color: .yellow, radius: 4)
            }
            .background {
                self
                    .shadow(color: .orange, radius: 2)
            }
            .background {
                self
                    .shadow(color: .red, radius: 12)
            }
    }
}
This extension adds a glow effect to any view, enhancing the visual appeal of our Bitcoin price display.
Conclusion
We’ve created a live Bitcoin price tracker using SwiftUI and WebSocket. The project demonstrates how to handle real-time data updates, use the new @Observable macro, and apply custom styling and animations in SwiftUI.
Feel free to copy the code and explore other techniques that you might find interesting!
Full Code
Here’s the complete code for the Bitcoin Price Tracker:
import SwiftUI
import Foundation// Define a structure for the JSON response
struct BitcoinPriceResponse: Codable {
    var bitcoin: String?
}
// ViewModel that handles WebSocket connection
@Observable
class WebSocketViewModel {
    var bitcoinPrice: String = "Loading..."
    var btcDouble: Double = 0.0

    private var webSocketTask: URLSessionWebSocketTask?
    private let urlSession = URLSession(configuration: .default)

    func connect() {
        guard let url = URL(string: "wss://ws.coincap.io/prices?assets=bitcoin") else {
            print("Invalid URL")
            return
        }
        webSocketTask = urlSession.webSocketTask(with: url)
        webSocketTask?.resume()

        receiveMessage()
    }

    func disconnect() {
        webSocketTask?.cancel(with: .goingAway, reason: nil)
    }

    private func receiveMessage() {
        webSocketTask?.receive { [weak self] result in
            switch result {
                case .failure(let error):
                    print("WebSocket receive error: \(error)")
                case .success(.string(let str)):
                    self?.decodeMessage(jsonString: str)
                    self?.receiveMessage() // Continue listening
                default:
                    break
            }
        }
    }

    private func decodeMessage(jsonString: String) {
        guard let data = jsonString.data(using: .utf8) else { return }
        do {
            let response = try JSONDecoder().decode(BitcoinPriceResponse.self, from: data)
            if let bitcoinPrice = response.bitcoin {
                DispatchQueue.main.async {
                    self.bitcoinPrice = "\(bitcoinPrice)"
                    self.btcDouble = bitcoinPrice.toDouble() ?? 0.0
                }
            }
        } catch {
            print("JSON Decoding error: \(error)")
        }
    }

    deinit {
        disconnect()
    }
}
// SwiftUI View
struct BitcoinPriceView: View {

    var viewModel = WebSocketViewModel()

    var currencyFormatter: NumberFormatter = {
        var formatter = NumberFormatter()
        formatter.maximumFractionDigits = .zero
        formatter.numberStyle = .currency
        formatter.currencySymbol = "$"

        return formatter
    }()

    var body: some View {
        VStack {
            Image(systemName: "bitcoinsign")
                .font(.caption2)
                .glow()
            Text("\(currencyFormatter.string(from: viewModel.btcDouble as NSNumber)!)")
                .font(.largeTitle)
                .monospacedDigit()
                .transaction { transaction in
                    transaction.animation = .default
                }
                .contentTransition(.numericText(value: viewModel.btcDouble))
                .glow()
        }
        .fontDesign(.monospaced)
        .onAppear {
            viewModel.connect()
        }
        .onDisappear {
            viewModel.disconnect()
        }
    }
}
// Preview for SwiftUI Canvas
#Preview {
    NavigationStack {
        BitcoinPriceView()
    }
    .preferredColorScheme(.dark)
}
extension String {
    func toDouble() -> Double? {
        return NumberFormatter().number(from: self)?.doubleValue
    }
}
extension View {
    func glow() -> some View {
        self
            .foregroundColor(.white)
            .background {
                self
                    .shadow(color: .yellow, radius: 4)
            }
            .background {
                self
                    .shadow(color: .orange, radius: 2)
            }
            .background {
                self
                    .shadow(color: .red, radius: 12)
            }
    }
}